
Hi there fellow adventurers!
We gave a workshop in muBuenos where we used git features to imagine how an attacker could use them to their benefit. The goal was to help people understand the risks of using untrusted repositories. Before that exercise, and to avoid polluting their environments, I provided a devcontainer.
Despite being a technical workshop for developers, I was surprised by how many attendees weren’t using any kind of sandboxing. They were running things locally.
Automatically in the back of my head, I started screaming “this is madness!” like in 300, the movie. I almost felt I was right in that situation but I was the one to do the kicking “spread awareness”.

Because of that atrocity situation, the following week we delivered a workshop specifically on devcontainers.
Then I got inspired and wrote this article, so you can start using devcontainers right away. You can even use The Red Guild's devcontainer!
The theory behind containers is in this Appendix. If you're curious, feeling lost, or just want to learn more, take a look at it.
What will you learn from this read?
- The importance of using a sandboxed environment
- Containers vs. virtual machines
- What a devcontainer is
- Hands-on
- Identify your needs as a developer / code reviewer / security researcher
- Create your own devcontainer
- Start your first project on it!
1. Importance of Sandboxing
Sandboxing is a fundamental security practice that ensures the integrity and stability of a system by isolating potentially harmful or untrusted code execution.
What makes a sandbox important? The principle of least privilege, the ability to do malware containment, it being a secure execution environment, working well with compliance and regulations, and being a great tech to do forensic analysis.
Nowadays there are lots of ways to do sandboxing. For example, you can find online services (any.run, joe’sandbox) to run malware in an isolated, customizable environment to fingerprint its activity (like indications of compromise); or use something like Firejail to run binaries on your Linux local host.
2. Containers vs Virtual Machines
If we're working with devcontainers, then we're also working with containers!
"But, what's the difference between containers and VMs?" - somebody asked during our workshop. It was clear to everybody that if both concepts were to be applied properly, they could be considered a sandbox or have sandbox capabilities.

You could say that VMs emulate an entire computer, including hardware through a hypervisor, whereas containers use the host OS's resources and isolate processes.
Today's virtualization methods have evolved in a way that they do not exactly match that specific criteria. VM modules have been integrated into the kernel long ago. One key example of this is the concept of Memory Ballooning in which the host system can reclaim memory from virtual machines (VM) by telling them to give back part of their memory to the host system. Another one is micro-vms.
3. Devcontainers
The core part of this article.
A devcontainer, short for "development container," is a preconfigured development environment packaged as a Docker container (could be Kubernetes as well).
Devcontainers provide a consistent, isolated, and reproducible environment for developers to work on a project, regardless of their local machine setup.
The features of devcontainers aren’t different from the ones of a container, except for the fact that they can be integrated with IDEs such as Visual Studio Code (IntelliJ, Pycharm, and possibly more that I don’t know of as well). This makes it possible to even declare the IDE's extensions that you want to use, and where you want to run them (locally or remotely).
By using a devcontainer in our code reviews, we're able to streamline the setup process, enhance collaboration, and ensure a consistent experience for all team members!
Enough reading, let’s put our hands to work 🔧
4. Hands-on
Let's see how you can build a simple devcontainer. I'll use as an example the one I built for my teammates at The Red Guild.
But I encourage you to create the one that best suits your (or your team's) needs.
4.1. Identify Your Needs
Consider the specific requirements of your workflow:
- Programming languages: Determine the programming languages you'll be using (e.g., Solidity, JavaScript, Python).
- Tools and libraries: Identify the necessary tools, frameworks, and libraries for your project (e.g. Hardhat, Foundry, NextJS).
- Extensions: List any VSCode extensions that enhance your productivity or provide additional functionality.
- Environment variables: Consider any environment variables or configurations specific to your projects.
For our case, I wrote down the following:
- Languages: Python, Go, JavaScript, Solidity.
- Tools and libraries: Hardhat, Foundry, Slither, Medusa, solc-select, fish.
- Extensions:
NomicFoundation.hardhat-solidity,tintinweb.solidity-visual-auditor,trailofbits.weaudit,tintinweb.solidity-metrics
- Environment vars: Not sure at this point, but possibly some tools will need to be added to $PATH, so we gotta look for that.
4.2. Create Your Devcontainer
To create your devcontainer:
- You must have the remote container extension installed in your VSCode. Launch VSCode Quick Open (
Ctrl+P), paste the following command, and press enter:ext install ms-vscode-remote.remote-containers - Create a
.devcontainer/folder in your project's root directory, and inside a new file nameddevcontainer.json. This file will define the configuration for your devcontainer. Check out this documentation on the schema for the devcontainer file or you can go directly to the official schema. - Specify the base image: Choose a base image for your devcontainer that aligns with your project's requirements. Popular options include official language-specific images (e.g.,
node,python,ruby) or general-purpose images likeubuntuordebian.You can also directly reference pre-built versions of Dockerfiles by using theimageproperty in.devcontainer/devcontainer.jsonor updating theFROMstatement in your ownDockerfile. An exampleDockerfileis included in most of the repositories of the base images so you can take a look. For now, ignore this. We’ll talk more about this later. - Select your VSCode extensions: Specify the VS Code extensions you want to be automatically installed in your devcontainer. This ensures that everyone using the devcontainer has access to the same set of extensions.
- Select your Development Container Features: these are self-contained, shareable units of installation code and development container configuration. The name comes from the idea that referencing one of them allows you to quickly and easily add more tooling, runtime, or library “features” into your development container for you or your collaborators to use.
- Define the container configuration: In the
devcontainer.jsonfile, specify the container settings such as the Docker image, port mappings, volume mounts, and environment variables. For example:
{
    // For format details, see <https://aka.ms/devcontainer.json>.
    "name": "TRG's devcontainer",

    // You can use "image" or directly use a "build" with a
    // Dockerfile or Docker Compose file.
    // More info: <https://containers.dev/guide/dockerfile>
    "image": "mcr.microsoft.com/devcontainers/base:debian",
    // "build": {
    //   "dockerfile": "Dockerfile"
    // },
    // Features to add to the dev container. More info: <https://containers.dev/features>.
    "features": {
    // By default, alpine brings this feature, so I'll leave it commented for you to see:
      "ghcr.io/devcontainers/features/common-utils:2": {
        "installZsh": "false"
        // "username": "vscode",
        // "userUid": "1000",
        // "userGid": "1000",
        // "upgradePackages": "true"
      },
      "ghcr.io/devcontainers/features/github-cli:1": {},
      "ghcr.io/devcontainers/features/go:1": {},
      "ghcr.io/devcontainers/features/rust:1": {},
      "ghcr.io/devcontainers/features/python:1": {},
      "ghcr.io/devcontainers/features/node:1": {},
      "ghcr.io/devcontainers-contrib/features/pnpm:2": {},
      "ghcr.io/meaningful-ooo/devcontainer-features/fish:1": {}
    },

	// Configure tool-specific properties.
    "customizations": {
    // Configure properties specific to VS Code.
      "vscode": {
        "extensions": [
          "NomicFoundation.hardhat-solidity",
          "tintinweb.solidity-visual-auditor",
          "trailofbits.weaudit",
          "tintinweb.solidity-metrics"
        ],
        "settings": {
          "terminal.integrated.defaultProfile.linux": "fish",
          "terminal.integrated.profiles.linux": { "fish": { "path": "/usr/bin/fish" } }
        }
      }
    },

	// Use 'forwardPorts' to make a list of ports inside the container available locally.
	// "forwardPorts": [3000],

  // Use 'portsAttributes' to set default properties for specific forwarded ports.
	// More info: <https://containers.dev/implementors/json_reference/#port-attributes>
	// "portsAttributes": {
	// 	"3000": {
	// 		"label": "Hello Remote World",
	// 		"onAutoForward": "notify"
	// 	}
	// },

	// Use 'postCreateCommand' to run commands after the container is created.
  // We're using a gist, but you can also reference the raw install-tool from your repo.
  // Unless you mount the scripts folder as
    "postCreateCommand": "Welcome to your first devcontainer!",

    // Uncomment to connect as root instead. More info: <https://aka.ms/dev-containers-non-root>.
	// "remoteUser": "root"
}
- Build and start the devcontainer: Open your project in VSCode and use the "Remote-Containers: Open Folder in Container" command to build and start your devcontainer. VSCode will create the container based on your configuration and open your project inside it.
Aaaand that should create a working container! It might be missing some tools, but we'll see how to add them later.
If you get into trouble while building, you can check the logs to troubleshoot. Upon failure, a message will pop up with three options: "Retry", "More Actions", and “Edit devcontainer.json locally”. The latter is the one you want since it will automatically open the editor and side-by-side the building logs.
4.2.1 postCreateCommand
To install the tools, I'm going to add them with a script install-tools.sh. It's inside the scripts folder, and I'll call it using the postCreateCommand of the configuration.
postCreateCommand actions are run once the container is created. Use it to run commands like npm install or to execute a shell script in your source tree (if you have mounted it).There are some alternatives to this, like mounting the scripts folder into the volume, but since we want to be as safe as possible, I’d advise against it.
My script is as follows:
#!/usr/bin/fish

# starship theme for fish
curl -sS <https://starship.rs/install.sh> | sh -s -- -y
echo "starship init fish | source" >> ~/.config/fish/config.fish
source ~/.config/fish/config.fish

# Some manual exports
## This makes pnpm installations to be available globally
echo "export PNPM_HOME=\\"/home/vscode/.local/share/pnpm\\"" >> ~/.config/fish/config.fish
## This is the default path for foundry's binaries
echo "export FOUNDRY=\\"/home/vscode/.foundry/bin\\"" >> ~/.config/fish/config.fish
## And here we just add both of them to PATH.
echo "export PATH=\\"\\$PATH:\\$PNPM_HOME:\\$FOUNDRY\\"" >> ~/.config/fish/config.fish
## Load it to our current environment
source ~/.config/fish/config.fish

# Install hardhat
pnpm install hardhat -g

# Install solc-select
pipx install solc-select

# Install slither
pipx install slither-analyzer

# install Medusa (crytic-compile)
pipx install crytic-compile

## Foundry framework
curl -L <https://foundry.paradigm.xyz> | bash
foundryup
This is how I call it inside the devcontainer.json:
"postCreateCommand": "curl <https://raw.githubusercontent.com/theredguild/devcontainer/article/.devcontainer/scripts/install-tools.sh> | fish -i && fish"
Note that I’m calling it directly from GitHub. It executes the installation script with fish and opens a fish prompt. Nothing fancy.
postCreatCommand’s install-tools.sh script to a proper Dockerfile.4.2.2. Dockerfile alternative
Why didn't I use a Dockerfile? Wasn't it the preferred approach?
Dockerfile will benefit from Docker's build cache and result in faster rebuilds than postCreateCommand.The answer is: features. I heavily relied upon devcontainer features.
Dockerfile runs before the devcontainer is created and the workspace folder is mounted and therefore does not have access to the files in that folder. A Dockerfile is most suitable for installing packages and tools independent of your workspace files.The underlined sentence says it all. A quick example for you to understand this is Hardhat requiring pnpm (satisfied by a feature) to be installed.
This means that moving our postCreateCommand script into a Dockerfile would make us move all the dependencies that were already deployed by the devcontainer features inside the Dockerfile too.
If you were to pivot to a Dockerfile and avoid using features altogether, continue reading or just head straight to the main branch of our devcontainer for a proper and updated example.
4.2.2.1 More on Dockerfiles
Beyond git, the image / Dockerfile that comes with base:debian includes zsh, a non-root VSCode user with sudo access, and a set of common dependencies for development.
If you use a minimal Linux like Alpine as your image, some of the devcontainer features you may add won't work, given the majority of them use aptitude instead of apk under the hood.
So, if we were missing the tools, and there’s no devcontainer feature that installs them by default. What should we do?
Remember that you can always replace the image field in the devcontainer.json for build referencing a Dockerfile which will allow us to customize our environment even more.
I’ll reference a somewhat analogous Dockerfile that replaces the features and includes the tools we were missing.
# This would be the equivalent of the 'image' field of the devcontainer.json
# It is now being referenced from the 'build' field.
# Base debian build (latest).
FROM mcr.microsoft.com/vscode/devcontainers/base:debian

# This creates a user vscode with that uid and gid
# The base Dockerfile defined in FROM already does this
#ARG USERNAME=vscode
#ARG USER_UID=1000
#ARG USER_GID=$USER_UID

# Update packages.
RUN apt-get update

# Install pipx
RUN apt-get install -y pipx

# Set the default shell to zsh
ENV SHELL=/usr/bin/zsh

# Running everything under zsh
SHELL ["/usr/bin/zsh", "-c"]

# Run under vscode user
USER vscode

# Install golang's latest version through asdf
RUN git clone https://github.com/asdf-vm/asdf.git $HOME/.asdf --branch v0.14.0 \
    && echo '. $HOME/.asdf/asdf.sh' >> $HOME/.zshrc \
    && echo 'fpath=(${ASDF_DIR}/completions $fpath)' >> $HOME/.zshrc \
    && echo 'autoload -Uz compinit && compinit' >> $HOME/.zshrc \
    && . $HOME/.asdf/asdf.sh \
    && asdf plugin add golang \
    && asdf install golang latest

# Install rust
RUN curl --proto '=https' --tlsv1.2 -sSf https://sh.rustup.rs | sh -s -- -y && source $HOME/.cargo/env

# # Install nvm, yarn, npm, pnpm
RUN curl -o- https://raw.githubusercontent.com/devcontainers/features/main/src/node/install.sh | sudo bash

# # Install solc-select
RUN pipx install solc-select

# # Install slither
RUN pipx install slither-analyzer

# # install Medusa (crytic-compile)
RUN pipx install crytic-compile

# ## Foundry framework
RUN curl -L https://foundry.paradigm.xyz | zsh
RUN foundryup

# # # Clean up
RUN sudo apt-get autoremove -y && sudo apt-get clean -y
Note that there are a few differences in this build. I replaced fish with zsh since it's getting installed anyway, and used asdf to install the latest version of golang.
For this reason, and to keep it simple for this article, I avoided using a Dockerfile. But if you were to harness the true power of a container, you would definitely need it.
4.2.2.2 Caveats
When trying to build your container, you might end up with a lot of images and volumes laying around. An important command that you may need if you create lots of images and volumes is: docker rm -vf imageid.
It will force-remove an image even if it is running.
If you've polluted everything, you can wipe the entire docker system with:docker system prune -a --volumes (use at your own risk).
4.3. Start your first project!
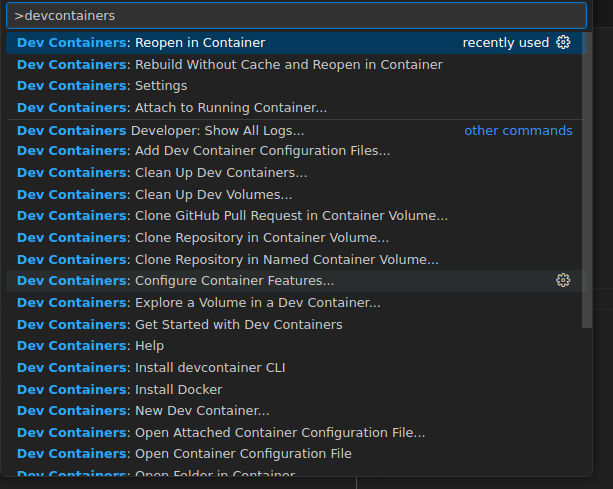
Once your devcontainer is up and running, you can start working on it however you like. There are many ways, you can explore them by accessing all its features through the command palette.
If you want to start throwing in some commands right away, open a new terminal (Ctrl+Shift+`) and that would be it, easy-peasy. You can even reopen a local workspace inside a previously created volume.
If you want to work on a specific project, such as a defined scope from a contest or a CTF challenge, use the 'Clone Repository in a Container Volume' option and paste the GitHub URL.

By following these steps, you'll have a fully functional devcontainer tailored to your project's needs, enabling you to develop, research, and collaborate effectively.
Remember to document your devcontainer configuration and provide clear instructions for team members to set up their own devcontainers based on your configuration.
4.3.1 Alternatives to devcontainers
Since you’re working with containers, you can host and run them anywhere. However, there are some services and projects that offer similar features for free or at a low cost.
CodeSpaces: After finishing your devcontainer, head directly to GitHub Codespaces, and import the repository on a new codespace. That would be it!
DevPod: This is a free tool used to create reproducible developer environments, and you can extend other providers’ functionalities as well.
Coder: They offer their infrastructure to run your workspace in the cloud.
Where will you run your code now?
I hope this article convinced you to take the next step in hardening your development and code review environment. Be it as an individual, or someone in charge of securing an organization.
So, where will you run your code the next time a LinkedIn recruiter asks you to do a technical test for a job offer?
Thanks for reading! If you liked it, comment below or share it on X! That way we can continue improving these types of articles.
Useful links
- Devcontainers extension
- Schema documentation and schema.
- Helpful devcontainer images:
- Features
- Templates
- Guide for VisualStudio remote development
- How to containerize an application
- Coder - coder.com
- DevPod - devpod.sh
- CodeSpaces